

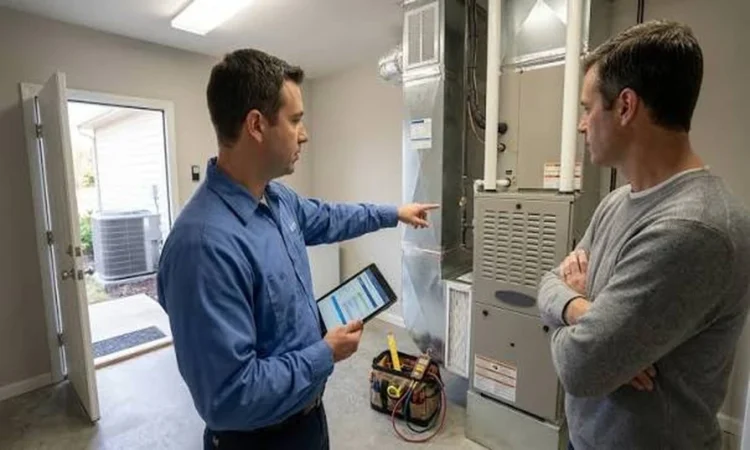
The number on an old furnace’s rating plate is one of the least reliable numbers in a house. It reflects a choice an installer made decades ago, before the attic got more insulation and the single pane windows were replaced, and sometimes before anyone calculated heat loss at all. Copying that number onto the replacement is the most common shortcut in furnace work. It tends to produce a unit that short cycles, runs loud, and still leaves the rooms at the end of long duct runs cold.
In the Portland area, the old size and the right size are often far apart. Winters here are long and damp but rarely severe, so heating loads are moderate, and many homes have been tightened since their first furnace went in. A careful replacement starts from the house and uses the old equipment only as evidence. The work then moves through sizing, airflow, venting, installation and testing, in that order.
Homeowners planning a new gas furnace in Clackamas can turn to Robben & Sons, which has installed and serviced heating equipment across Oregon and Southwest Washington for more than 91 years. Its NATE certified technicians install and repair gas furnaces from all major brands. Because the ductwork is already open during a furnace replacement, indoor air quality improvements can be planned into the same project. Before choosing equipment, schedule an in home furnace assessment so the sizing and duct checks are based on your house rather than on the old unit.
Assessing the House and Calculating the Load
- Gather the history. The technician asks which rooms run cold, how long the burner runs on a chilly morning, how the system handled past cold snaps, and what has changed in the home since the current furnace was installed.
- Measure the envelope. Room dimensions, window area and type, attic and wall insulation, and the condition of the crawlspace or basement all go into the calculation. A blower door test replaces a guess about air leakage with a measured figure.
- Run a room by room heat loss calculation. The industry method, ACCA Manual J, calculates heat loss for each room at the local design temperature. The room figures matter as much as the total, because they later decide how much air each duct has to deliver.
- Select equipment to the load. Using Manual S, the installer chooses a furnace whose output covers the load without a large surplus. In this region the result is often smaller than the unit being removed. A two stage or modulating model is a common choice because it can run at low fire through most of the season.
Testing Ducts and Airflow
- Measure total external static pressure. Readings at the existing furnace show how hard the blower has to push against the duct system. High readings point to undersized returns, restrictive filters or crushed runs.
- Inspect the runs. Many local ranches and split levels route supply ducts through vented crawlspaces, where disconnected joints, torn insulation and moisture are common. Leaks there pull damp crawlspace air into the system and lose heat before it reaches a room.
- Check returns against the new airflow. Even a correctly sized furnace needs enough return air. Adding a return or enlarging a filter grille is often the least expensive comfort fix in the whole project.
- Match the blower to the ducts. A variable speed blower can work around some duct limits, but the ductwork still caps how much air the system can move. Any duct changes the house needs get planned at this stage, not discovered after installation.
Reviewing Venting, Combustion Air and Gas Supply
- Choose the venting path. An 80 percent furnace vents through a metal flue, often into a masonry chimney. A condensing furnace rated above 90 percent vents through plastic pipe and produces condensate that needs a drain.
- Protect the water heater. When a condensing furnace stops using a shared chimney, a gas water heater may be left venting alone through a flue that is now too large for it, which can cause weak draft and condensation. The installer decides whether the chimney needs a liner or the water heater needs its own vent.
- Confirm air and gas capacity. The installer checks that the space has enough combustion air for every fuel burning appliance in it and that the gas piping is sized for the total input of all connected appliances.
- Pull the permit. Oregon requires a mechanical permit for a furnace replacement. The Building Codes Division’s statewide interpretation on CO alarms explains that replacing one fuel fired appliance with another does not by itself trigger a CO alarm requirement, while switching from electric heat to gas does. Many homeowners install alarms anyway, which is the safer choice.
Installing the Furnace
- Shut off gas and power, remove the old unit, and inspect the plenum and platform underneath.
- Set the new furnace level on a stable base, with any pitch the manufacturer specifies so condensate drains properly.
- Seal the supply and return plenum connections with mastic so the new airflow is not lost at the first joint.
- Connect the gas line with a sediment trap and shutoff valve, then leak test every new fitting.
- Run the vent and condensate lines at the correct slope and wire the thermostat and controls.
Commissioning and Safety Tests
The Consumer Product Safety Commission advises that furnace inspections verify fuel input rate, gas pressure and operating temperatures and check vents for leaks and blockages. A new installation should pass the same checks before the installer leaves.
- Set gas pressure and clock the input. This confirms the burner fires at its rated input, not above or below it.
- Run combustion analysis. A flue gas analyzer measures oxygen and carbon monoxide in the exhaust so the burner can be tuned for clean, complete combustion.
- Measure temperature rise. The difference between return and supply air temperatures has to fall within the range on the rating plate. A rise that is too high overheats the heat exchanger. A rise that is too low suggests excess airflow.
- Test for spillage and ambient CO. With doors closed and exhaust fans running, the technician checks around the furnace and water heater and confirms that the safety switches shut the burner down when they should.
- Hand over the system. The homeowner learns how to change filters, use the thermostat, and where CO alarms belong. CPSC recommends one in the hallway near each sleeping area.
The Answer Behind the Rating Plate
A new furnace should match the old one’s size only if a fresh load calculation happens to land on the same number. A replacement sized from the house, matched to ducts that were actually measured, vented with the water heater in mind, and tested with instruments on startup day performs very differently from the same box set in place based on the old label. Most of the value in the job comes from work done before the old unit comes out and after the new one first fires.
The paperwork shows whether that work happened. A load calculation report, static pressure readings, a permit, and recorded combustion and temperature rise figures all indicate a replacement that was engineered for the house rather than simply swapped in.

