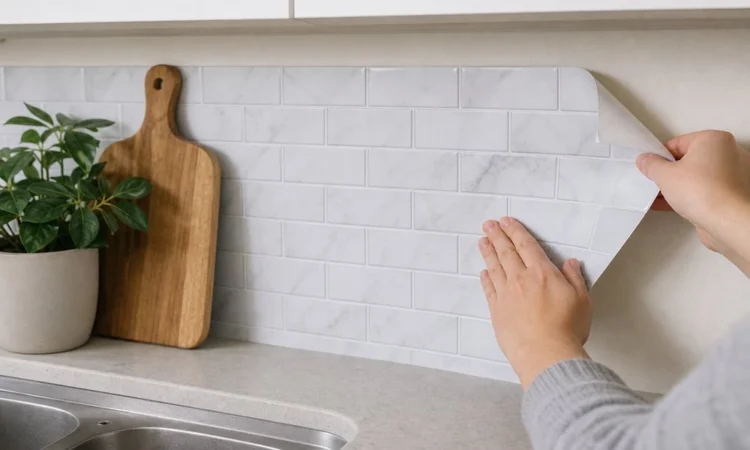
Kitchen backsplash materials
A rental property’s galley kitchen might feature old paint behind the toaster, laminate counters with a chipped front edge, and a lease agreement that forbids any “permanent” changes. Similar precautions should be observed when getting a home ready for sale. A simple refresh shouldn’t result in torn drywall paper surrounding a receptacle, cracked grout around the sink, or a cost of repair that outweighs the value added by the update.
Match the Finish to the Situation
Choosing the right material means considering what needs to be undone when the tenant moves out or when the seller closes. A renter’s galley kitchen may require a peel-and-stick tile that comes off without a trace. A condo unit’s compact kitchenette with stained paint might do better with thin plastic tiles that disguise blemishes without raising the faceplate of electrical outlets. And a kitchen destined for the MLS will look more cared-for than neglected with a simple ceramic tile backsplash.
First, Assess the Actual Wall
Before buying materials, take a good look at the area between your counter and the overhead cabinets. Grease can build up behind the coffee maker, and a painted wall might show tiny ridges from a previous paint roller or a hole from a loose screw next to the light switch. Adhesives don’t adhere well to dirty, glossy, or flaking surfaces.
Look closely at the edge of the counter as well. Laminate counters might have a lip of exposed metal, or a line of caulk that has turned yellow near the sink. Tile or sheet material must fit neatly against the counter or moisture will find a way behind the new surface.
Written permission from the landlord is essential if you’re planning to use an adhesive-backed product, even if the package indicates it’s removable. It’s wise to document pre-existing damage, including stains, nail holes, and peeling paint, with photos. A partially peeled cabinet decal or a scuff mark near an outlet could prove tricky to account for later.
Peel-and-Stick Tile for a Rental Galley Kitchen
Peel-and-stick vinyl tile, laid out without much jargon at https://www.cnet.com/home, is a great choice for a galley kitchen where the stove is placed very close to the sink, making it difficult to lay out a large sheet of tile. The individual tiles can be easily maneuvered around cabinet corners, and if you mess up a cut, you haven’t wasted a big piece of material.
Select a flat design without raised patterns. Faux-grout lines can trap grease, especially along the wall behind a fry pan. Matte finishes can help conceal small splashes that appear after washing dishes.
To test adhesion, apply one square tile to an out-of-the-way spot, like behind the microwave oven or at the end of the upper cabinet row. Wait 24 hours and gently peel it off to check whether the paint comes off with it. Skip this step if there’s already peeling paint along the window frame, or bubbling paint behind the sink. The tiles will probably get taken up eventually, but the paint underneath won’t get fixed unless it’s fixed now.
Thin Peel-and-Stick Panels in a Drab Condo Kitchenette
In a condo kitchenette, there aren’t usually many things breaking up a long galley-style wall, such as a few feet of counter, a small sink, and a single outlet above a crock of wooden spoons. Thin peel-and-stick panels work well for covering faded beige walls or an outdated faux-tile backsplash without creating any significant depth around outlets.
Peel-and-stick backsplash panels
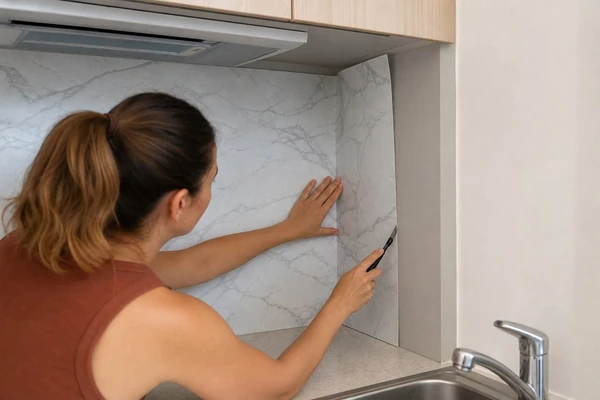
Lay out the panels on your counter before installing them. With marble-look designs, pay close attention to the repeats in the pattern. It looks funny to have two matching dark marbling blobs side-by-side, once the under-cabinet lighting is turned on. If the factory-cut edge is noticeably uneven at an inside corner, trim it.
Be patient with cutting holes around outlets. First, remove the outlet cover. Mark the hole location from the front side of the panel, and cut just inside the line. Don’t cut the hole large enough that you see a crescent of the old wall to the right or left of the outlet cover.
Make sure the panel sits flat, don’t try to force it around a bow in the wall.
When Basic Ceramic Tile Makes More Sense
In a kitchen being prepared for sale, ceramic tile makes sense as a more durable finish if the existing backsplash is dirty, damaged, or nonexistent. A simple field tile in a neutral shade is typically easier to live with than a bold pattern that clashes with patterned countertops, dark hardware, and a high-contrast floor; the practical side of kitchen backsplash installation starts there.
For the team at Gaven Constructions, preparation is what separates a clean-looking backsplash from a DIY-looking one. Scrape away all old caulk along the countertop joint. Secure loose areas of old paint. Sand back any dried paint bumps or lumps of drywall compound. A tile installed over a hump might look okay when viewed from the far side of the kitchen, but it’ll cast a noticeable shadow when the sun shines through the window onto the backsplash.
Keep the installation practical. Start with the most important section of the wall, usually the portion behind the stove, and don’t try to squeeze a small piece of tile into the middle of the wall. Caulk along the counter at the end so water doesn’t drip behind the bottom row of tile from a dripping faucet.
Don’t Leave Regrets Behind
No matter which material you use, thoroughly clean the area that will accumulate cooking grease using an appropriate degreasing cleaner, and make sure the wall is completely dry. The strip of wall next to the range hood above the salt shaker requires more prep than the wall by the pantry door.
Save some spare tiles or panel pieces, as well as any packaging. Take photos of how you did the outlet and counter joints, so you don’t forget. If your choice is a removable product, practice taking it down on the sample area, well in advance of moving day. Photograph the condition of the wall, cabinet doors, and location of outlets before you open the first package.